Welcome to my BlogSpot. I have created this blog in hopes of inspiring everyone to cook. I have found my inspiration from living in both Southern and Northern California. My influences in flavors have come from family recipes and meals with emphasis on healthy foods, marrying into an Italian family and the ethnic flavors throughout California. There are so many wonderful memories connected to our family dishes as well as new memories in the dishes that have been recently created. My husband, Randy who is recently retired, has been my biggest supporter and inspiration in our kitchen. He is my taster, my sous chef, and has created some really great dishes himself, which will be added to this blog. It is my hope that you too will be inspired to cook and create your own dishes for your loved ones and enjoy the craft of cooking.

One thing I ask of you is if you print out, email and pass out my recipes, please include my name and link.

Be sure to check out my Sweaty Equities blog about the ups and downs of crafty projects and our DIY remodels.
You can find it at http://sweatyequities.blogspot.com/

Saturday, June 7, 2014

Hawaiian Style Glazed Chicken Breasts


With a side of Heirloom Swiss Chard with Tomatoes and Shredded Carrots
and Brown Rice with infused Ginger and Teriyaki Sauce


You can’t go wrong with this recipe. Your chicken breast will always be juicy and tender.


6-8 Chicken Breasts

For the Marinade:
1 cup beer
½ cup teriyaki sauce
1 tablespoon sesame oil
1 teaspoon grated ginger
2 teaspoons chopped garlic
¼ cup concentrated orange juice
½  cup crushed pineapple

Combine the ingredients and pour over the chicken in a ziplock bag. Squeeze out the excess air and marinade overnight. Barbeque the marinated chichen breasts on medium/high heat for about 6-7 minutes on each side. The chicken is done when the internal temperature reaches 140 degrees. Remove and cover with foil for about 15 minutes, then serve.
We serve this dish with a side of brown rice infused with a little teriyaki and ginger and Heirloom Swiss Chard with tomatoes and shredded Carrots.
I usually make 8 breasts. It is great on salads and in tacos, so it is nice to have extra on hand.
Enjoy!

~Susie

Heirloom Swiss Chard with Tomatoes and Shredded Carrots


Paired with Hawaiian Style Marinated Chicken Breasts and Brown Rice infused with Ginger
and a Little Teriyaki Sauce 

We like to eat clean. –Fresh, mostly organic foods. We also love those old recipes handed down from the family. One of my favorite things to eat is Randy’s Pasta E Fagioli  I grew Swiss Chard so that we could have those fresh, tender baby leaves, not easily found in the grocery stores for Randy’s Pasta E Fagioli.
Yesterday I noticed that the Swiss Chard needed to be harvested. (Cutting the leaves off the plant. It will renew itself throughout the growing season.)  While tending to the garden and knowing that I have chicken marinating I thought of how I wanted to do this Swiss Chard side dish. I gathered up the Swiss Chard and green onions and came up with a plan. I would have gathered up tomatoes too but they are still green.—Just a few more weeks. Recipe below: 


Combine in a pan and season it

Towards the end, add the shredded carrots

Then the chopped basil followed by the honey


Ingredients
2 tablespoons olive oil
Swiss chard, the more the better as they shrink when cooked
1 bunch of green onions
6 tomatoes, medium to small
Salt and pepper to taste
¼ teaspoon crushed red pepper
1 teaspoon chopped garlic
½ cup shredded carrots
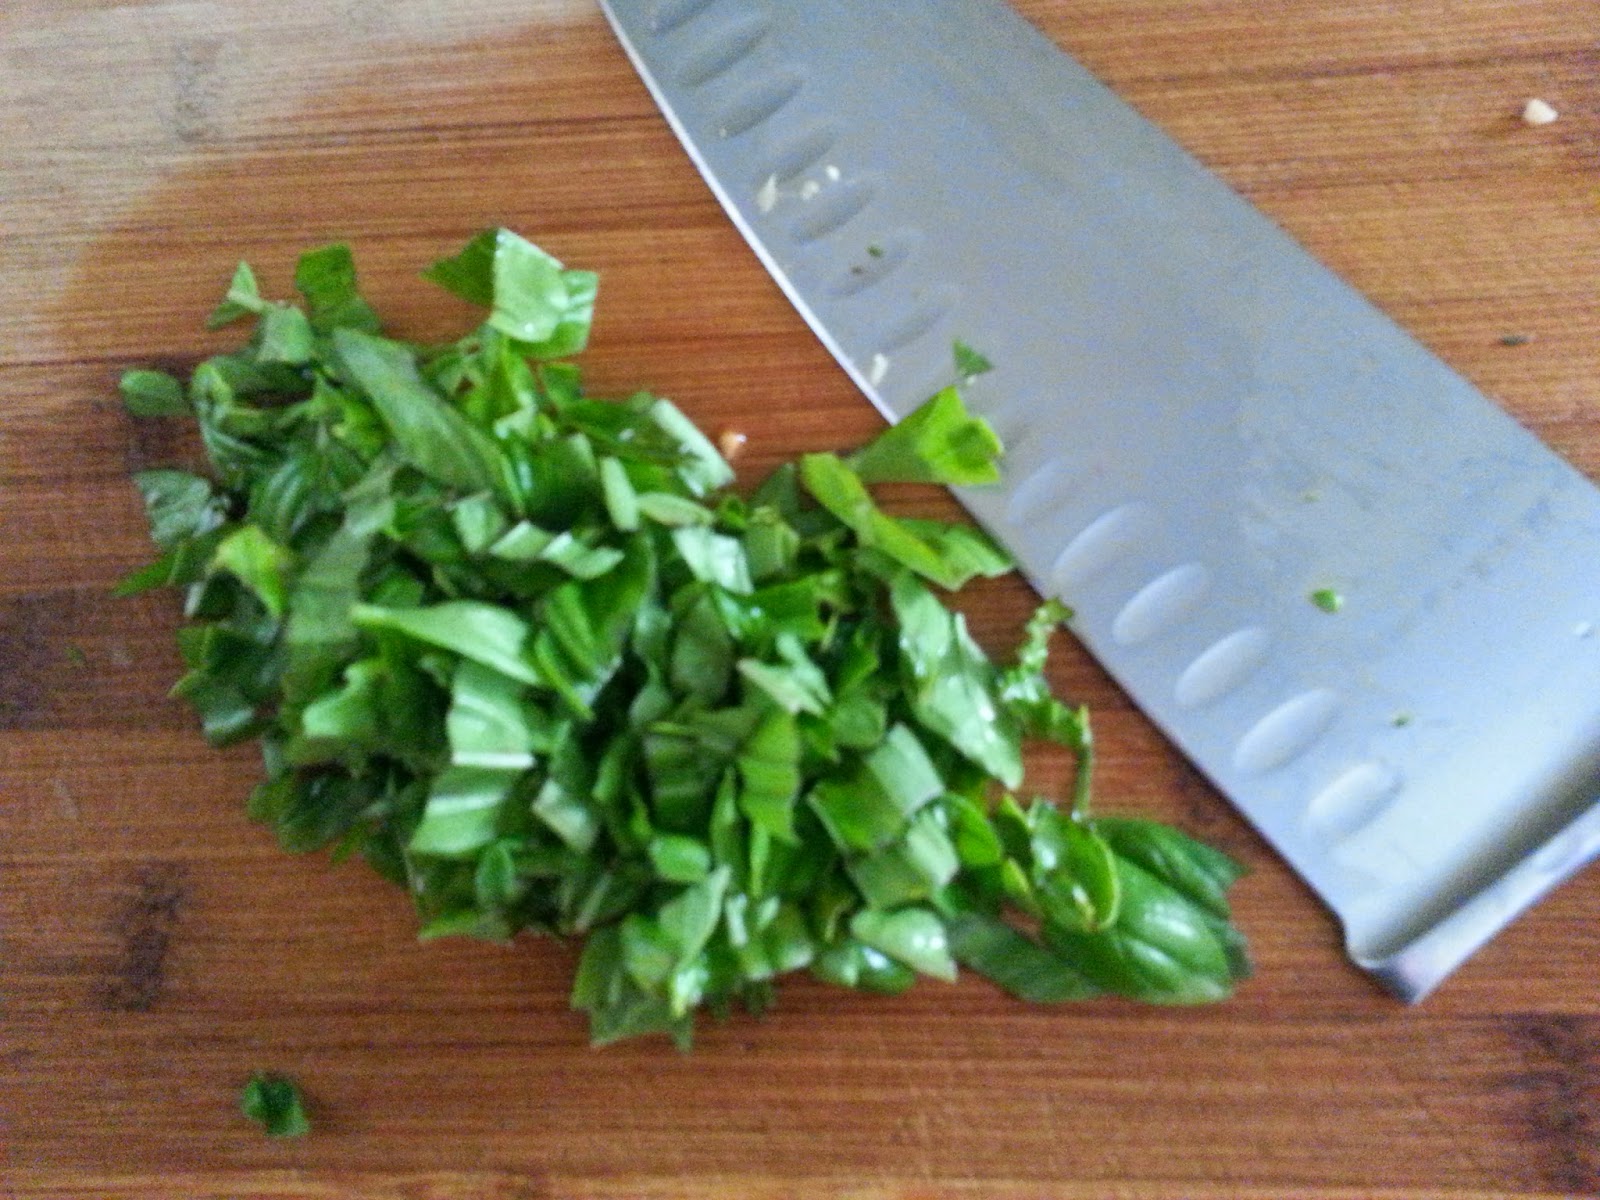
¼ cup chopped fresh basil
1 tablespoon honey –I like the raw, local grown honey
Trim, wash and chop the Swiss Chard and green onions, quarter the tomatoes and add to a medium/hot pan with olive oil, along with the crushed red pepper, stirring frequently. Add the salt and pepper to taste. When you notice the Swiss chard wilting add the garlic and sauté for 1 minute, then add the shredded carrots and sauté for 1 minute, then the basil for about 30 seconds. At the end drizzle the honey in a pinwheel motion to cover most of the vegetables. Turn off the heat and give it a quick stir to combine all the ingredients.
That’s it. You’re done.
Now this was an experiment for me so I wasn’t sure how good it was going to be. Well let me tell you. I have planted more Swiss chard seeds to ensure that we can make this dish even more. It was that delicious.
Enjoy!

~Susie

Saturday, February 1, 2014

The Ultimate Snickerdoodle

This recipe has been in our family for years. It is a family favorite and once you make these you won’t be getting your Snickerdoodles anywhere else. Recently I have been baking with organic coconut oil in place of butter or shortening. I didn't think these cookies could get any better but coconut oil made did make it better.


The Ultimate Snickerdoodle

Preheat Oven to 375 degrees F.
1-1/2 cups shortening (or Organic Coconut Oil)
2 cups sugar
3 eggs
2 teaspoons vanilla
3-3/4 cups flour
3 teaspoons baking powder
1-1/2 teaspoons baking soda
1 teaspoon salt

¼1/4 cup sugar
1 teaspoon cinnamon.
Combine the sugar and cinnamon into a shallow bowl for rolling the dough into.

If you choose to use coconut oil, it is best to melt it. Combine the shortening (or coconut oil) and sugar and cream together. Beat in the eggs and cream together, then add the vanilla and mix well. Slowly add the flour, baking powder, baking soda and salt. Blend well. Using a melon ball scooper, scoop out even size scoops and form into balls, then roll into the cinnamon and sugar mixture. Place them on a greased baking sheet about 3 inches apart and bake for about 11 minutes.

Granddaughter McKenna gives her seal of approval.


Enjoy!
Susie Tronti


Easy Lasagna (No Pre-Cooking the noodles)

The trick to cooking your noodles in the pan is to water down your marinara sauce. The noodles absorb the sauce as they cook and the sauce will thicken. This recipe makes calls for a very large roasting pan and will easily serve at least 12 people. Make sure your pan is about 5 inches high for all the layers. You can make ahead of time when you’re going to have a large gathering, then pop in the oven.


Easy Lasagna (No Pre-Cooking the noodles)

Preheat Oven to 300 degrees
¼ cup olive oil
1 bell pepper, finely chopped
1 large onion, finely chopped
5 cloves garlic, minced
3 lbs of ground beef, turkey or chicken
1 lb ground Italian sausage
½ teaspoon crushed red pepper
1 teaspoon dried basil
1 teaspoon dried oregano
Salt and pepper to taste
3 cups Ricotta
2-3 cups shredded mozzarella
1 lb lasagna noodles, uncooked
In a large pan, sauté the bell pepper and onion until soft. -Salt and Pepper. Add the garlic, ground meat and sausage, then the crushed red pepper, basil, oregano and salt and pepper and cook until the meat is thoroughly cooked. (I choose to drain off the fat in a colander at this point) Return the meat mixture back to the pan.
Now add your marinara (spaghetti sauce) to the meat mixture, but leave 2 cups out for the last layer over the noodles. Thin the sauce with about ¾-1 cup water and simmer for about 30 minutes. To keep it simple there are a lot of great tasting sauces at the grocery store. I grow tomatoes so I always have jars on hand of the homemade stuff.
Now it’s time to layer the lasagna. Start with putting a little of the thinned out sauce at the bottom, then layer with your uncooked lasagna noodles next. Leave some space in-between because the noodles will expand as they cook. Next comes half the meat and sauce mixture. Spread evenly over the noodles. Now add your Ricotta in dollops onto the meat mixture, then half the mozzarella evenly. Now it’s time for your second layer of noodles, then rest of meat sauce, ricotta and mozzarella. Add the third layer of noodles. Add the remaining 2 cups of marinara, thinned with some water, to the top of the noodles. Cover with foil and seal it tightly. The steam from the sauce will cook the noodles.
Cook for 2 hours in a 300 degree oven. I actually cooked it for 90 minutes then turn it to "keep warm" Until we were ready to sit down for dinner.


Enjoy!

Susie Tronti

Friday, September 27, 2013

Canning Fresh Tomato Vodka Marinara


Last Spring my husband and I planted 6 raised garden beds. Ahead of time we planted tomatoes to get a good start on the season. We planted mostly heirloom tomatoes. We ended up filling 1-1/2 of the 4 foot by 8 foot beds with the tomato plants. Then to our surprise last year’s tomatoes seeded themselves in the old bed by the herbs. What do you do with all those tomatoes? You make sauce. One of my favorite recipes is from the show “Barefoot Contessa” - Nick and Toni's Penne Alla Vecchia Bettola -This is such a good recipe that I decided to use the basic idea of this marinara to can my Fresh Tomato Marinara.
 

Let me also add that last year we bought a Vitamix. What an awesome blender. It makes sauces so silky and creamy.
OK so now I’m going to tell you how I made my Marinara sauce using the Vitamix, but at the end I will give you instructions for the sauce if you don’t have a Vitamix.

½ Cup Extra Virgin Olive Oil
3 Large Yellow or White Onions, chopped

½-1Teaspoon Crushed Red Pepper –depending on how spicy you like it
Salt and Pepper

2 Teaspoon Dried Oregano
2 Teaspoon Dried Basil

12 Large Cloves Garlic –finely chopped
2 Cups Vodka

3 Heaping Colanders of Tomatoes –cleaned and stemmed (Sorry, I didn’t weight them)
6 Large Carrots –cleaned and peeled

Salt and Pepper again
1 Cup Fresh Basil Leaves –cleaned and dried

1 Teaspoon Fennel seed
1 Teaspoon Granulated Garlic

1 Teaspoon Granulated Onion
Sugar to taste –It balances out the acidity

Start by picking and prepping your tomatoes and carrots. Place them in Roasting pans and sprinkle with salt and pepper. Roast them in the oven for about 45 minutes at 375 degrees. (I roasted them in my smoker which has the ability to get this hot) When done you will see that the tomatoes are soft and there is a lot of liquid in the pans. This is called tomato water and is an important part of your marinara.
 
**While the tomatoes are roasting this would be a good time to bring your canning pot to a boil.

In a large deep pan, sauté the onions in the olive oil, adding the crushed red pepper, oregano, basil salt and pepper. Sauté until the onions are tender and sweet. Add the garlic and sauté for 2 minutes more. Turn off the heat. Add the vodka and slowly bring your mixture up to a simmer. Be careful. Vodka is flammable. It’s best to make sure the pan you’re using has high enough sides as not to splash out. Let it reduce all the way. Strain out the tomato water from the tomatoes and add to the pan of sautéed onions. I use a wire strainer to keep the seeds out. Now let the tomato water reduce almost completely. You will not believe how beautiful this tastes when reduced.

While the tomato water is reducing, add the roasted tomatoes to the Vitamix, peels, seed and all and carrots. If you don’t have a Vitamix, peel the skins off the tomatoes first then add to the blender. You will need to do this in batches. I usually do 3 batches, so I divide out the fennel seed, basil, granulated garlic and onion, then add about 1 tablespoon sugar to each blending batch, along with some salt and pepper. Pour each batch in a large pot and keep on simmer, stirring occasionally. Also keep an eye on your tomato water being careful not to burn the onions/garlic mixture. Once your tomato water is reduced by about 80%, you can add to the pot of blended tomatoes for a chunky tomato marinara, or you can choose to blend the reduced tomato water/onion mixture in the blender for a very silky consistency, and then add to the tomato sauce. Now taste it. It should not be acidic or lacking in salt. If so, add more salt, sugar or even pepper until the taste has balance.
 

Place 6 one quart jars and lids in the boiling canning pot to sterilize just before using for a few minutes. Fill each jar up to ¼ inch from top. Wipe the rim clean with a clean cloth then center hot lid on jar. Apply band and adjust until fit is fingertip tight. Process filled jars in a boiling water canner for 35 minutes, adjusting for altitude. Remove jars and cool. Check for seal after 24 hours. Lids should not flex up and down when center is pressed.
Enjoy-
Susie Tronti

Monday, February 18, 2013

Whole Grain Banana, Apricot, Cranberry Muffins

I’ve recently learned about the benefits of the ch-ch-ch-chia seed. They digest slowly making you feel full faster. They stabilize your blood sugar levels and are loaded with fiber and other benefits. You can find Chia Seeds in bulk, at about 10 dollars per pound at any whole foods/fresh/organic type of store. My goal is to come up with a few recipes that are delicious and loaded with beneficial ingredients. Today I made these muffins and they turned out great. They are super moist and satisfying, and the best part is how great the house smells. Enjoy the recipe below.


Whole Grain Banana, Apricot, Cranberry Muffins

*¾ Cups Coconut Oil
¾ Cups Brown Sugar
2 Eggs at room temp
½ Cup Sour Cream
¼ Cup Chia Seeds
1 Teaspoon Vanilla
1 Teaspoon Salt
2 Teaspoons Baking Powder
¼ Teaspoon Baking Soda
1 Cup Mashed Bananas
2 Cups Flour (see below)
Pecans
Cranberries
Chopped Dried Apricots


Preheat your oven to 350 degrees.
(For the flour I used ½ cup unbleached flour, ¾ cup Whole wheat, 2 Tablespoons Amaranth flour, ¼ cup Steel Cut Oat Flour, ¼ grinded Bulgar Wheat Flour, and 2 Tablespoons Flaxseed. I have a Vitamix with an attachment the mills whole grains, but I noticed that “Bob’s Organic” carries a large line of milled grains. Feel free to mix in your favorite whole grain flours)
*Coconut Oil is best blended when melted down and blended well with the sugar. At room temp it is a hard solid consistency. It’s ok to substitute with butter.
Combine the melted coconut and sugar and cream well. Add in room temperature eggs and blend well. Add the sour cream and chia seeds and blend. Add the vanilla, salt, baking powder, baking soda and blend. Add the mashed bananas and blend well. Add the Flour and blend well, followed by the pecans, cranberries and apricots.
Using an ice cream scooper, put one scoop of batter each in a paper lined muffin pan. Bake for 22 minutes or until done. Makes approximately 16 muffins.
Enjoy-
Susie Tronti

Friday, January 4, 2013

Honey/Lime glazed Salmon over Stir Fry Veggies with Steamed Brown Rice and Warm Beat and Carrot Asian Slaw, drizzled with Mango Vinaigrette


Randy and I are trying our best to start experimenting with healthier foods. Today we went to the Market and bought a lot of fresh veggies. We also want to keep on hand steamed brown rice and beans as well as have proteins ready for quick meals. When making steamed brown rice, you need to make sure you start it 2 hours before you’re ready to eat it because, being whole grain, it takes longer to soften the rice through the cooking process. The recipe I’m giving makes about 4 cups of rice but it keeps nicely in the refrigerator for a week, plus we need to get our whole grain intake daily so this makes it easy access.
Now, as a kid, I didn’t like beats, but that’s because they came from a can! When you buy them fresh they are so much better. Don’t forget to buy your beats with the leafy tops still attached. Those leaves are edible and great when sautéed for about a minute or so.
So here’s what I came up with for tonight’s meal. I’ve written it out in the order I cooked it.

Steamed Brown Rice
2 Tablespoons Olive Oil
Sauté together for 1 minute.
Add 1 Quart of Organic Vegetable Broth and bring to a boil
Add 1-3/4 Cups Whole Grain Brown Rice.
Bring back to a boil and turn down to a simmer for 50 minutes with a lid on the pot. Turn off the heat after the 50 minutes and let stand for about 30 more minutes with the cover on it.

Prepare all the veggies first because they cook fast.

2 Cups Broccoli, chopped
½ Red Onion
½ Red Bell Pepper
Place all the purple ingredients in a container
The leaves off the beets chopped and washed thoroughly.
4 Stalks Celery, sliced
1 Baby Bok Choy, sliced
1 Teaspoon Freshly Grated Ginger
1 Teaspoon Freshly Grated Garlic
A handful of Cilantro
Place the green ingredients in a separate container
-Set aside until ready to cook.

Warm Beet and Carrot Slaw
1 Medium Beat, shredded
4 Carrots, shredded –This can be done in the food processor with a grater attachment.
1 Teaspoon freshly grated Ginger
½ Teaspoon Chinese Five Spice
2 Teaspoons Organic Honey, locally grown is the best flavor
1 Teaspoon Sesame Oil
The Zest of 1 Orange
Combine the ingredients and set aside until you have the stir fried veggies going. Then you will steam the beet slaw in a microwavable container for 2 minutes on high. –How easy is that?

Now let’s get the Mango Vinaigrette started.
In a blender combine
½ Cup Mangos
1 Tablespoon Honey
1 Tablespoon Rice Wine Vinegar
2 Tablespoons Peanut Oil
1 Teaspoon Minced Garlic
1 Teaspoon Sesame Oil
1 Teaspoon Grated Ginger
1 Teaspoon Sriracha
The juice of one Orange
Blend until creamy. If the honey doesn’t blend well, you can microwave the ingredients until warm.

Back to the Prepared Veggies-
In a pan or wok, Pour 2-3 Tablespoons of Peanut oil and 1 teaspoon Sesame Oil and a pinch of Crushed Red Pepper Flakes. Add the purple ingredients. These ingredients will sauté on medium high for about 4 minutes before adding the green ingredients below. After the purple ingredients have stir fried for 4 minutes, add the green ingredients and cook for 2 additional minutes.
Go ahead and get the beat slaw in the microwave at this point. Remember, just 2 minutes.

Salmon
Season the salmon with salt and pepper
In a medium/ high pan combine 2 Tablespoons Peanut Oil and 1 Teaspoon Sesame Oil. Add the Salmon. Once you flip the salmon, brush on the honey lime ginger mixture (below in black) and continue to cook the other side. Cook to medium-rare. Remove the salmon and let it rest while you stir fry the veggies and steam the slaw.

For the Salmon glaze
Combine in a small container:
1 Tablespoon Honey
1 Teaspoon Lime Juice
1 Teaspoon Freshly Grated Ginger

On your plate, layer the rice, then the stir fry veggies, and place the salmon on top. Place the slaw on the side, touching the veggie/rice mixture and drizzle around the plate with the Mango Vinaigrette.
-Enjoy!
By Susie Tronti